Friday, December 31, 2010

New Stampin' Up! Occassions Mini Catalog...New Year!

Hello Gals!

It's early morning on Dec. 31st, I'm enjoying my 1st cup of coffee, sitting in my favorite chair with the new puppy in my lap. Yes, I did say new puppy...an 11 week old Jack Russell which we appropriately named Sugar. She has taken away my freedom to schedule my time, as I wish. But, I am a determined woman...and I WILL get her trained...that is, I think I can :)

Have you all been thinking about a new year's resolution??? Well, mine is quite simple, but will be quite challenging bcause, life here is always so busy. And, us women always seem to focus on taking care of those around us. So my resolution: Take better care of myself! Of course, that includes losing weight and eating healthier...I think the most common resolution. But I also want to improve on my spiritual life, my physical life, and oh yes...my mental life. And, we all know where this is going...my mental life is at it's best when I am stamping!!!

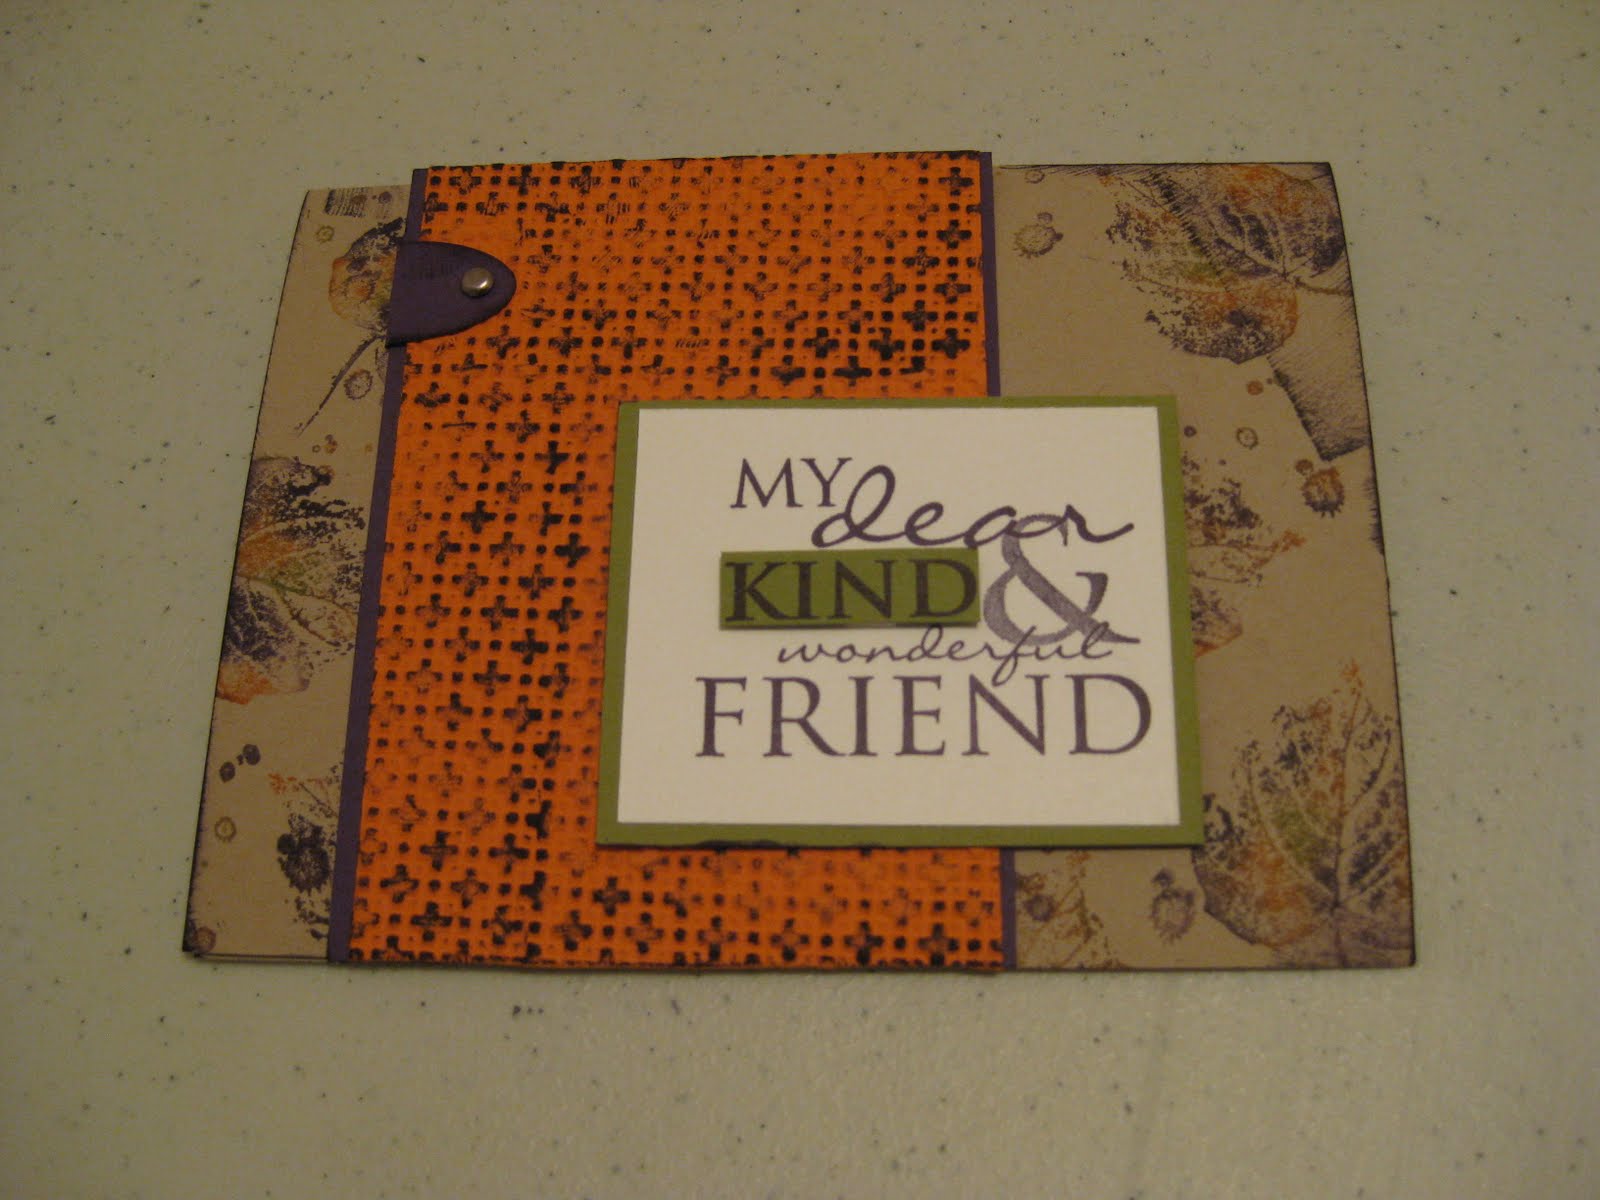
So...I am anxious to get back to stamping with a ton of new goodies! Yes, the new Occassions Mini catalog begin Jan. 3rd and the new Sale-A-Bration promotion begins Jan. 25th. As a Stampin' Up! Demonstrator I have the pleasure of getting my goodies prior to the catalog release date. I got in a little stampin time, and this is one of my first cards with new goodies!

I used the Valentine Defined stamp set with some designer paper and CASED a card from the Stampin' Up! Demonstrator Magazine.


I really like how it turned out! I have a few more samples to share... soon! So check back for more mini ideas!

Happy New Year!

Wednesday, December 29, 2010

Stampin' Up! Filled With Love Promotion


An awsome new Stampin' Up! bundle for creating beautiful Valentines! Check out this awsome offer, and contact me to order your Valentine bundle today! Or, order online through the link on the right top of the blog page!

thanks for visiting. More Valentine ideas coming soon!!!

Tuesday, December 14, 2010

Christmas 12 x 12 Scrapbook Page


For our Christmas scrapbook page, I used a pagemap layout, and altered it a bit to come up with this month's page. I look at many ideas, so I picked up little ideas here & there from Stampin' Up! demonstrator ideas, & this is what I came up with!


Stamps: Tags til Christmas, Baroque Motiffs, Word Play
Cardstock: Always Artichoke, Cherry Cobbler (my current fav:) Very Vanilla, Soft Suede, & Crumb Cake (almost called it Kraft...so hard to get used to that name change), designer paper is from Deck the Halls
Cherry Cobbler Seam Binding, Jewels, Stampin' Dimensionals, Ornament Punch, Decorative label Punch, Glue Dots, Tasteful Trim XL Bigz die cut,

I think this layout allows plenty of room for pics...

Hope you can join me for the next class, featuring a SNOW THEME. Keep an eye on my schedule posted on the right hand side of the blog!

thanks for visiting!!!

Sunday, December 12, 2010

More Christmas Cards!!!

A short time back, one of my downline gals, Wilma, came over to stamp with me. We shared stamps & I got a great stack of cards created from the images I stamped with her that day.

So, thanks, Wilma, for sharing your stamps with me, & here is a peak of some of the completed cards from that day, and what I have been working on.

Merry Crittermas stamp set with the Candy Cane Christmas designer paper


The Jolly Old Saint Nick stamp set reminds me of my childhood. So, I really got into creating cards with it. Here are several of them.

Jolly Old Saint Nick stamp set


Jolly Old Saint Nick stamp set


CASE of a swap card using Jolly Old Saint Nick stamp set


Jolly Old Saint Nick stamp set


Come to Bethlehem stamp set


Case of swap card using Bells & Boughs


And...my absolute favorite... Angelic Joy stamp set


This card was created CASING an idea from a demo swap, same colors & layout as swap card, but using this beautiful stamp set.

Hope some of these ideas inspire you to get your Christmas cards completed soon!!!

Thanks for stopping by!

Saturday, December 11, 2010

Shame, Shame for not Sharing!!!


That's right, I deserve it!!! Shame, Shame on me for not sharing! The past 3 months have been very busy planning each of my Christmas classes. We created cards for two months, for a total of 10 new card ideas. For those of you that participated in both creating two of each, you have 20 beautiful hand stamped Christmas Cards ready to address. And, don't save them...Be sure you get them mailed to family & friends. They will treasure your hand stamped creations!!!

Here is a peak of the 2nd Christmas Card Class for those of you that weren't able to attend...

The card ideas came from many sources, from my Stampin' Up! Demonstrator magazine, to ideas from fellow demonstrators.

And more ideas to come!!!

Tuesday, November 16, 2010

Amazing 50% Off Demonstrator Offer!

Simply Adorned Charms

Sometimes, the best ideas come from you!

Thank you for my most recent hostess, Jennifer, for her idea of creating charms for the Simply Adorned product line(page 189 of the big catalog). We decided to create charms, and the workshop guests were able to use the charms to create 3 x 3 notecards, or leave the charms seperate for necklaces. For the 3 x 3 cards, simply cut a piece of cardstock 3 x 6. Stampin' Up' has envelopes for mini cards (pg. 171 of the big catalog, Mini Square Envelopes #107309). We used the charming stamp set, & Tiny Tags stamp set. Also used the Tiny Tags punch, & Jewels!


Here is the assortment of charms we created. Some of them were CASED from fellow demonstrators! Wish you could see them in person... they are adorable! Don't forget, they are included in the Holiday Promotion Bundles, the Simply Adorned Gift Bundle includes the 1 x 1 1/4 Charm, 24 inch chain, & Charming Stamp set. Bundle #124076 for $39.88. That is 20% off!!!

Sunday, November 14, 2010

Christmas is only 6 weeks away!

Have you been working on Christmas cards yet??? Can you believe Christmas is only 6 weeks away!!! Well, if you missed the Christmas Card Stamp a Stack here's a peak at the projects. And, my next Christmas Card classes are on Nov. 18th & Nov. 20th. There is still room if you are interested in joining us!


CASE Jen Pitts
Winter Post stamp set, Script Background Stamp, Four the Holidays sentiment
cardstock: Riding Hood Red, Baja Breeze, Very Vanilla, Chocolate Chip
Ink: Whisper White, Chocolate Chip
Accessories: Embossing Powder, Heat Gun, Gold Waffle Paper, Stampin' Dimensionals


NOEL Card
Bella toile background stamp, Inside sentiment from Come to Bethlehem
Ink: Crumb Cake
Cardstock: Crumb Cake, Very Vanilla, Real Red
Accessories: Big Shot Naturally Serif Alphabet set die cuts, Inside Top Note Die cut, Vanilla Seam Binding ribbon

SNOWMAN Card CASE Debbie Currier
Tags Til Christmas Stamp Set, Four the Holidays Sentiment
Cardstock: Baja Breeze, Pink Piroutte, Whisper White
Ink: Baja Breeze, Real Red
Accessories: Candy Cane Christmas Designer Paper, Tasteful Trim Big Shot Die Cut, Dazzling Diamonds stampin glitter, 2 way glue pen, 1 1/4 circle punch, Scallop Circle punch, stampin dimensionals


Come To Bethlehem Card, CASE Barbara Byrnes
Stamp Set: Come to Bethlehem, Elements of Style, Baroque Motifs
Cardstock: Rich Regal, Whisper White
Accessories: 2 1/2 inch circle punch, white ribbon, 1/16 circle punch
Ink: Craft white, Rich Razzleberry
Note: This card was created using the masking technique. Punch the 2 1/2" circle from a sheet of paper. Use the negative of the circle when stamping the focal image. Use the positive circle when stamping the background.

Bells & Boughs card
Bells & boughs stamp set
cardstock: Cherry Cobbler, Always Artichoke, Naturals White
Ink: Always Artichoke, cherry cobbler
Accessories: Deck the Halls Designer Series paper, Gold Waffle Paper, Sticky Strip, Blender Pens or Aqua Painter, Watercolor Pencils, Cherry Cobbler Seam Binding

Monday, November 1, 2010

With Gratitude Technique Sample

Sometimes my customers are my best inspiration! I had a customer ask me if they could learn the chalkboard technique. So, this is what I decided to try with the group. This stamp set is awsome, and the large medallian was perfect for trying the chalkboard technique.

We began stamping the image with whisper white craft ink on Expresso card stock. The cardstock was cut twice with the Top Note die cut. Cut, the turn & cut again! Then used Stampin' Pastels chalk to color the image. You can use sponge daubers, or the applicators that come with the chalk. Mine is subtle, or you can add more color if you choose.

Cardstock is pear pizzaz & Expresso. Designer paper is from the in color level 1 Hostess selection. Also used the new Designer Label Punch!

Was fun getting out my chalks again. They are a great product to have, so many colors when you use the VersaMark ink base & pounce the color on!

Sunday, October 31, 2010

Frankie Treat Bag!


There are so many cute ideas for the Big Shot Top Note! Just about any face out there, from Uncle Sam to Irishmen!!! Thanks to all of the Stampin' Up! Demonstrators that share ideas throught the Stampin' Connection.

Frankenstein never looked better! And this mini treat bag is perfect for our favorite trick or treaters!

Happy Halloween!!!

Sunday, October 24, 2010

Amazing Leaves!


Fall leaves have taken center stage at my recent workshops. And, why wouldn't they...the new French Foilage stamp set from the Stampin' Up! Winter Mini Catalog has the most amazing leaf images. It has been fun to play around with the colors, to get different effects.

In the 1st card sample I used Pumpkin Pie, Old Olive, & Eggplant.We used the baby wipe technique to get the multi colored leaves. The sentiment is from All Holidays. I also used one of the amazing embossing folders, Square Lattice.


In the 2nd card sample I used Expresso, Marina Mist, & Daffodile for the color combo. . What color combos would you choose??? thanks for stopping by!

Thursday, October 21, 2010

Stampin' Up! Handmade Holiday Promotion!


Wow! Stampin' Up! has an awsome promotion featuring products perfect for your holiday projects. There is bundle pricing with 20% off!!! There are products great for cardmaking,tags, packaging, home decor, & an awsome bundle featuring the Simply Adorned charm neclace & stamp set.

You can check out the promo on my business web site! How about adding a bundle to your next Stampin' Up! order...order through my business web site 27/7, call me, or add a bundle to the next workshop you attend during the holiday sales period. better yet, how about hosting your own In-Home Workshop!!!

And, is there anyone that has Stampin' Up! on their Christmas Wish List??? contact me with your list & I will be happy to be your Christmas Elf!!!

Wednesday, October 20, 2010

Thanksgiving Scrapbook Page!

Blogging is a great deal of fun... but it has also been a bit difficult lately! I have been extremely busy with classes, work, and in general... life! But, you are all very important to me, and I truly enjoy sharing project ideas. And, what better way is there than to post pictures. Well, I guess videos would be better. It is in the plans, but I am not there yet :) Anyway, I have had this strange problem that my pictures are coming up sideways. Don't know why this is happening...but I am having to re-take photos & get back to the posts when I can.

My scrapbooking photos came out good (thank goodness) so I will share them with you today!

We completed Class #2 of my 12 x 12 Scrapbooking Series last Saturday morning & had a great time completing our Thanksgiving pages. This scrapbook layout was cased from fellow Stampin' Up! Demonstrator, Doris Denman and I thought it would work perfectly with the Day of Gratitude stamp set. We used the emboss resist technique on the medallion, cut it out, & added a button center! Always fun to add in a technique for a unique page element! Cardstock colors: More Mustard, Cajun Craze, & Garden Green! We used the Spiral Punch & New Decorative Label punch. Sizzix Naturally Serif Sizzlet Decorative Strip Die for the alphabet.

It has been a great way for me to get my scrapbook pages done too!


Let me know if you would like to join us next month for a double-page Christmas layout!

Hope to be back soon...

Wednesday, October 6, 2010

Fall Scrapbook Layout

My first love of papercrafts was scrapbooking! But, since I became a demonstrator for Stampin' Up! I really haven't done many pages. I wanted to get back to it, and what better way than to offer a monthly scrapbook class to customers. That would force me to get work on my own scrapbook, and for me to get at least one page layout done every month!

So, here is the 1st layout from the monthly scrapbook class which we did in September.

We used the new French Foliage stamp set with the color combo of Riding Hood Red, So Saffron, Soft Suede, Baja Breeze, & Crumb Cake. Leaves were stamped & cut out. We used the new Bigz LX Die, Tasteful Trim. I think I will be using this die cut for many projects. It is awsome for scrapbooking because it cuts 12" strips. Also, we used the Serrif Essentials alphabet die cuts. We also used chipboard on one of the F's in the alphabet to add some additional dimension. Love how you could make your own chipboard alphabet with the Sizzix Big Shot!!! Additional supplies used, buttons, Stampin' Dimensionals, & twine!


Here's a close up of some of the page elements!


Hope you will join me for the next scrapbooking class on Oct. 16th! Call to reserve your spot!!!

Saturday, October 2, 2010

Thankful for...

October...my favorite month! The morning air is beginning to be crisp, the afternoon temps are an amazing 72 degrees! And, best of all, leaves are beginning to turn! I absolutely love the amazing beauty of fall leaves :)

Today's card is a CASE of a fall wreath card created by fellow demonstrator, Ann Schach. But I wanted to use my Sizzix Big Shot & the #2 Leaves die cut to see what I could come up with. I began with Stampin' Up! gold cardstock, die cut the leaves, & ran them through the Vintage Wallpaper embossing folder. Not enough for me...I then ran a piece of Pear Pizzaz cardstock throught the Vintage Wallpaper embossing folder. Then sponged on lots of color, chocolate Chip, Old Olive, & Cajun Craze. The gold leaves were sponged with Cajun Craze. I arranged leaves in wreath, adhered with Stampin' Dimensionals (my #1 must have item). Assembled card, & stamped sentiment from Thankful For stamp set, and added Certainly Celery satin ribbon.

I took a couple of photos so you can see the dimension of this card. Very fun!!!


Here are a couple of additional ideas using the #2 leaves die cut. The Silver leaves are created from furnace tape! So, they have a sticky layer on the back. Would be great on a card!


And... how about fabric! I picked up this fabric this morning from the fabric store. You can't see from the picture, but the little polk-a-dots are shiny copper on chocolate brown. They will be beautiful on a project!


Hope you liked today's project! Come back & visit soon!!!

Thursday, September 30, 2010

Stampin' Studio Revealed!

I am soooo excited about the new Stampin' Studio classroom that I wanted you all to see pictures. You can now attend classes at my home, and if I forget an item or if someone wants to see something not already in the classroom, it's no problem to go grab it for you!

For those of you that have attended my classes at the museum & church, you know how much stuff I bring! Wow, it was a chore preparing, making sure I brought everything needed, packing, setting up, then packing back up, loading the car, etc...

So, here are the pictures. I have more work to do, but so far, it is working out great!

The 1st photo is my 3-D project display. There are many projects displayed, and some of them have retired product. But, the display is for your inspiration to show you how versitile Stampin' Up! products are.


Here is a picture of the work area :)


The next photo is my greeting card display! Many of the cards displayed were received from demonstrator swaps, and additional cards of mine. And, oops...I need to update this display with current mini catalog products :)


And, I love this corner of the room...the Big Shot Station!

Dies are stored below in baskets, and everything within reach!!!


Still need to decorate the walls... I have some Stampin' Up! Decor Elements to adhere, and more ... but off to a great start.

Hope you will join me for the next class, check out the schedule and contact me at www.stampingfunaddict.com if you are interested. Space is really limited now, so register early!

Thanks for stopping by!

Monday, September 27, 2010

Spooktacular Stamp Class!


Last Thursday we had our Spooktacular Halloween Class, and there was no shortage of candy! I always buy too much, and having all that candy around is scarry in itself :)

This is a picture of the group of 6 projects. We created 2 cards, & 4 treat projects! The candy sleeve is a great, easy project for trick or treats. We used a 5 1/2 inch x 5 1/2 inch sheet of designer paper. Slipped treat inside & wrapped & adhered sides (assuring not too tight to slide out) and glued the bottom & sides together. Then crimp bottom with paper crimper & decorate! Designer paper was from the Wicked Cool designer paper pack, & stamp set was Wicked Cool!

See the tags with witch's feet sticking up? That cute project was CASED from fellow Stampin' Up! Demonstrator, Kimberly Van Diepen! Her creation was so adorable, I copied it just as hers'! Also, used the Wicked Cool stamp set for the witch's feet colored with markers & cut out. Two Tags Sizzix die cut, is the sleeve for the candies. Just adhere 2 tags on bottom crease, cover chocolates with designer paper, & decorate the front!

Autumn Harvest pumpkins were stamped on designer paper, cut out, and adhered to front of card base. Also used the awsome polk a dot Sizzix embossing folder. Sentiment is from Tiny Tags (it's a great set with a sentiment for just about every occasion). Next project is the treat cup lolipop. Just love the treat cups, and this one designed to open in the back for easy removal of candies :)

See the image of the adorable little girl sitting on top of a pumpkin? She is from Greeting Card Kids! It is a great new stamp set!!! We used watercolor paper & the Aqua pen to color her. Then layered on the new Spider Web embossing folder, and added designer paper and border punch.

How about that little milk carton Sizzix die cut, with coordinating stamp set!

Hope you enjoy the peak of the projects we created, and I really hope you will join me for the next card class... Christmas Cards!!!

Thanks for dropping by!

If you want any further product info, you can contact me at stampingfunaddict@gmail.com!!!

Wednesday, September 15, 2010

Spooktacular Sneak Peek


Halloween will be here before you know it! How about joining me for the Spooktacular Halloween Class! We will create 3 greeting cards, & 3 special Halloween treats. I can wait to share these projects with you, & here is a peek of 2 of the class projects. The Big Shot mini milk carton die cut is adorable, & mine is dressed up for Halloween fun & filled with treats! This paper piecing pumpkin card is just too cute, & simple to make!

Be sure to contact me ASAP to reserve your seat in the upcoming class on Thursday, Sept. 23rd! Only $15 to create 6 adorable Halloween projects, & yes, candy is included to fill your treats!!!

Tuesday, September 7, 2010

Boo!!!


My first pennant! What a cute Halloween Decoration this makes!

Last Christmas one of my awsome downlines, Sarah, gave me a Christmas pennant. I absolutely loved it! But I had never made one myself...so I CASED some of here ideas, and added a little of my own!

Of course, I began with the Stampin' Up! exclusive Bigz die cut. I chose to use the small pennant for this project & the Naturally Serif Sizzlits Decorative Strip Die for the alphabet. For each piece of the banner, I used 2 of the scallop circles included in the die cut. I folded them between the scallops, adhered them together to get the accordian fanned circle. Then I used Tombow glue on the edges & sprinkled the new Silver Glass Glitter on the edges. The new Glass Glitter is in the Stampin' Up! Holiday Mini Catalog. Love this chunky glitter, with tons of shimmer!!! Finishing touches, Jumbo Eyelets adhered with the Crop-a-Dile, tied together with one of my favorite ribbons, the 1 1/4 Striped Grosgrain!

Now, where to place my cute little Boo Banner???

Thanks for dropping by!

Thursday, September 2, 2010

Stampin' Up! Class Schedule Updated, & more...

The new Stampin' Up! Holiday Mini catalog is here!!! If you haven't gotten your copy, & would like to receive one, e-mail me at stampingfunaddict@gmail.com!!!

So many occasions are just around the corner, & the new Stampin' Up! Holiday Mini catalog has so many awsome new products, from Halloween, Fall-Thanksgiving, Christmas, & Valentines Day! Maybe you just need some designer paper to freshen up your stampin' stash, or a new Big Shot embossing folder, or die cut... The only problem is, you may have problems choosing which products to purchase!

You could always book a workshop, & get some the new products FREE!!! Hmmm, now there's a thought!!!

Or, better yet, now is a great time to sign up as a Stampin' Up! Demonstrator!!! check out my website at www.bethkendzora.stampinup.net to peak at the awsome new Greenhouse Gala tote ($39.95 retail value) that you can receive FREE when you purchase the Stampin' Up! Demo kit for only $175! It is a great value, and NO OBLIGATION TO HOLD WORKSHOPS!!!


And, check out my Stampin' Up! class schedule...I have added Scrappin' Saturdays each month, and a card class each month. contact me soon to reserve your spot!!!


I am working on designs for the Spooktacular Halloween Class, and here is a fun little punch art card I came up with. Now, I cannot claim the idea of the punch art bat & ghost created with the XL Owl punch. But, I created the tombstone with the new Extra Large Decorative label punch (from the new mini). I thought it worked well...what do you think? And, the sentiment is from the Wicked Cool stamp set. (I love this one, just too cute with the witches feet!)

Don't know if this one will make the cut, but it is quite simple, & fun to create!

Thanks for stopping by :)

Thursday, August 26, 2010

Holiday Mini Card Sample, & more...

The new Stampin' Up! Holiday Mini Catalog is "awsome"!!! There are amazing new stamp sets, die cuts, embossing folders, designer papers, embelishments, ribbons, & so much more...

Here is my 1st sample to share with you from the Stampin' Up! Holiday Mini Catalog!


This stamp set has the most incredible, realistic leaves! My card was created using a MOJO Monday Sketch. Very simple layout. Card base is Very Vanilla, & dry embossed with Sizzix Big Shot Vintage Wallpaper Embossing Folder. Additional cardstock is Expresso, Old Olive, & Cajun Craze. Ink is Cajun Craze, Expresso, Old Olive, & So Saffron. Completed project with Vanilla Satin Ribbon. Wow, I love the fall colors!

And, here is another little project I wanted to share! My husband made this 10 x 10 sheet metal board for me :) I have it on an easel to greet customers at my new Stampin' Studio classroom! And, the little magnetic clip was CASED from the Stampin' Up! Idea Book & Catalog, page 200!!! I was looking for a project to creat with the Seniors that I work with. And, this was perfect!!! They covered their tin boards with designer paper, & created the magnetic clips to match! The magnetic clips use clothespins, the ribbon border punch, a little ribbon, & magnets for the back. Was a great time with them, as always!!!


Come back to visit soon, and in the meantime, Happy Stamping!

Friday, August 20, 2010

Whooo could use some cute office supplies???

It's been a while, so I apologize for my absence. I have been busy, busy, busy...
We have converted a downstairs bedroom into my new craft studio. I can't wait to have classes in my home. Have any of you seen how much stuff I pack into my car for those stamp camps??? Besides re-decorating my new room, I have been working on creating samples from the next catalog, the Stampin' Up! Holiday Mini. It will knock your sox off, sooo awsome!!! Only a couple of weeks left on the current Stampin' Up! Summer Mini catalog. Be sure to order your favorites before they are gone. And, working on my next class, Back to School! Reminder: Aug. 27, 6-9pm at my house, pre-registration required!

Well, lets face it...8 a.m. hits and we sit down to that same desk, covered with the same stack of papers, day after day... Summer is coming to a close, and we need a little something to make that desk more inviting! Or, do the kids need something fun tucked in their school supplies? Altered office supplies are sure to put a smile on your face. I have added a couple of photos of one of the projects from the upcoming Back to School class. Photo includes front & inside of the post it note purse.


Isn't that little owl adorable!!! And the Play Date designer paper, too cute!!!Whoooo wouldn't love this fun project???

And...we have file folders to match...WooooHooo! Gotta love it!!


Thanks for stoppin by!